Security Assertion Markup Language (SAML) gives users secure access to EverSQL (SP) through an identity provider (IDP) of your choice. It works by transferring the user’s identity from one place (in this case, Azure AD identity provider) to another (EverSQL). Enabling Azure AD SSO authentication through EverSQL can be done in few easy steps.
Note: SAML SSO is available to Enterprise plans only. Other federated authentication methods such as Google Single Sign-On are available for all plans.
Configure Azure SSO with EverSQL
Step 1: Create a SAML app in Azure AD
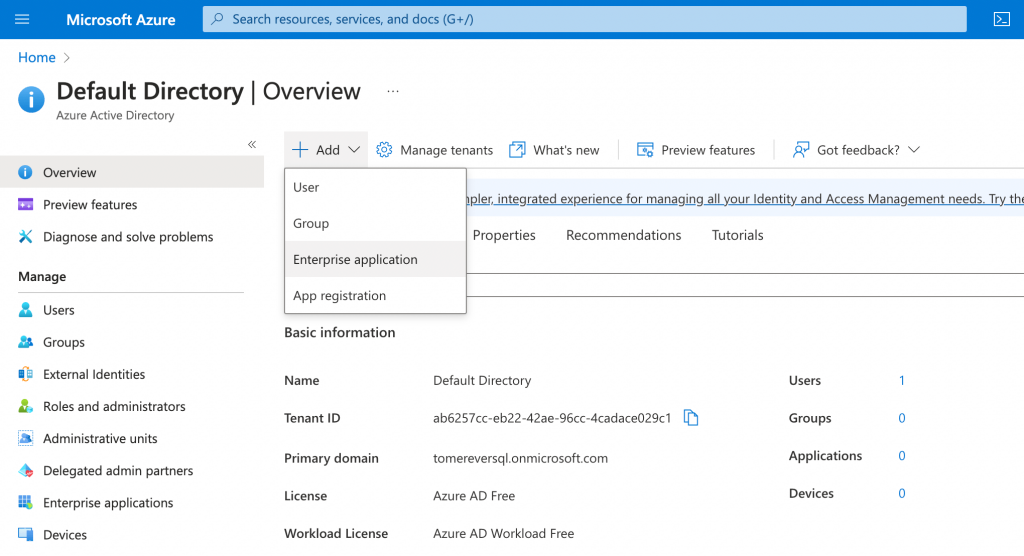
- Log in to the Azure Portal.
- In the Azure Services section, choose Azure Active Directory.
- In the left sidebar, choose Enterprise applications.
- Choose New application.
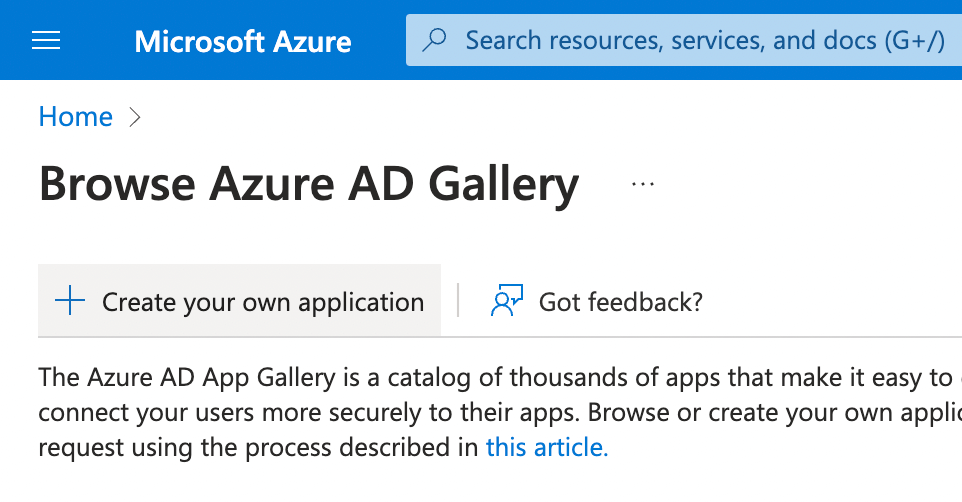
- On the Browse Azure AD Gallery page, choose Create your own application.
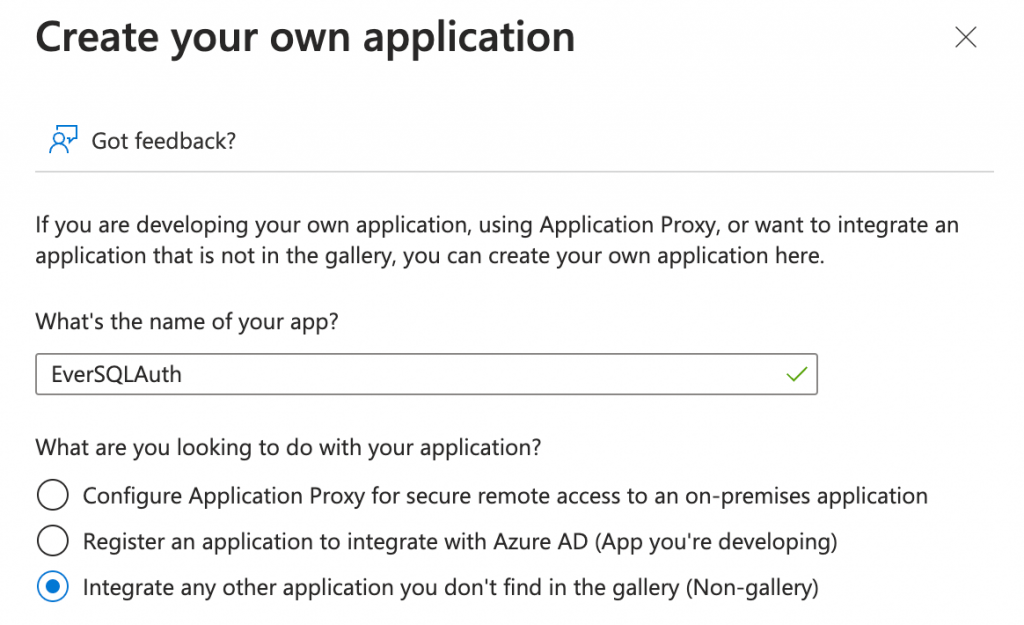
- Under What’s the name of your app?, enter a name for your application (for example, EverSQL) and select Integrate any other application you don’t find in the gallery (Non-gallery).
- Choose Create.
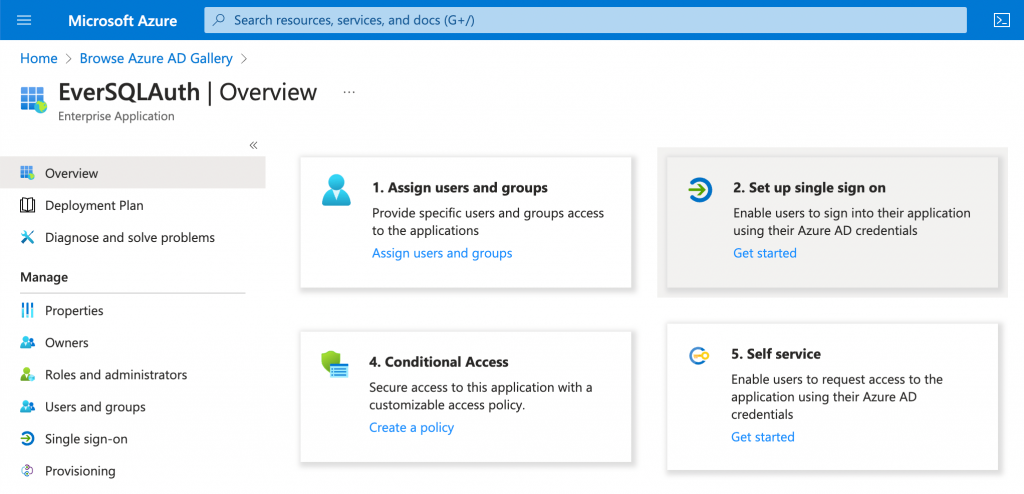
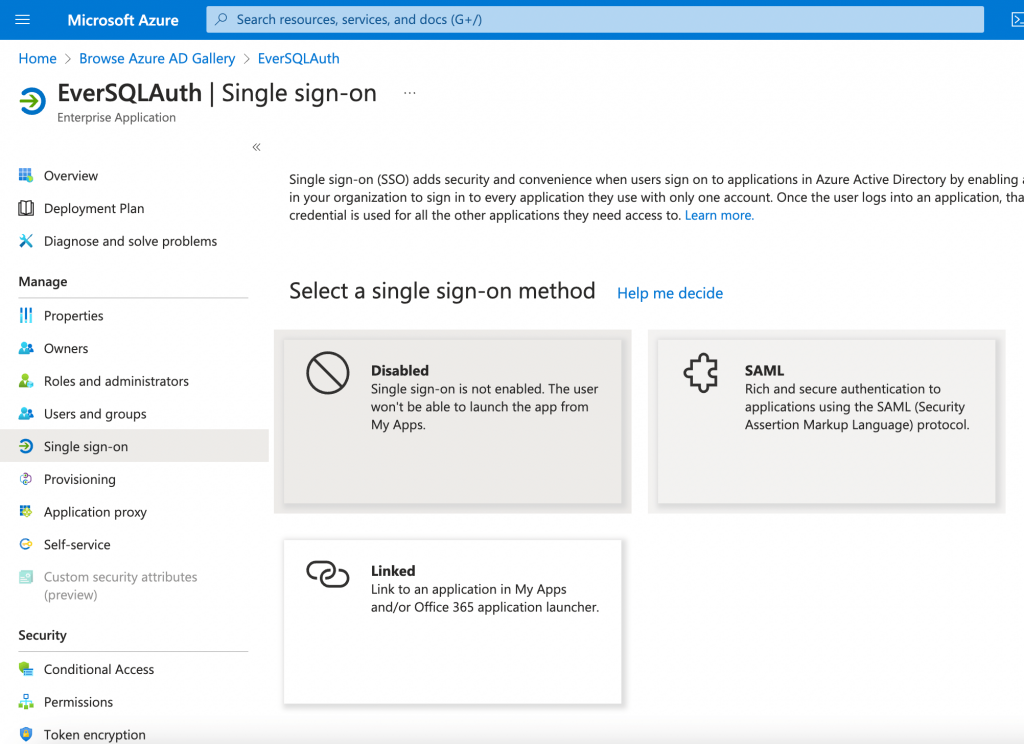
Step 2: Configure SAML integration for your Azure AD app
- On the Getting started page, in the Set up single sign on tile, choose Get started.
- On the next screen, select SAML.
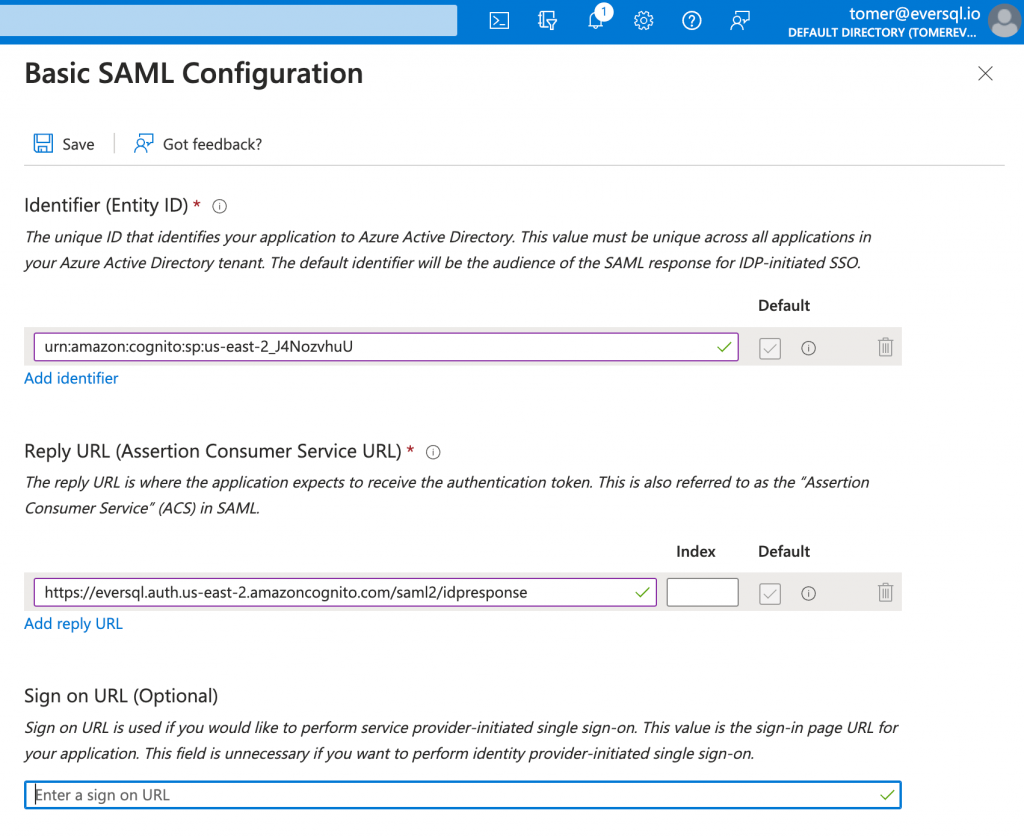
- In the middle pane under Set up Single Sign-On with SAML, in the Basic SAML Configuration section, choose the edit icon (
 ).
). - In the right pane under Basic SAML Configuration, replace the default Identifier ID (Entity ID) with urn:amazon:cognito:sp:us-east-2_J4NozvhuU . Replace the Reply URL (Assertion Consumer Service URL) field with https://eversql.auth.us-east-2.amazoncognito.com/saml2/idpresponse .
- Choose Save and close the side-window.
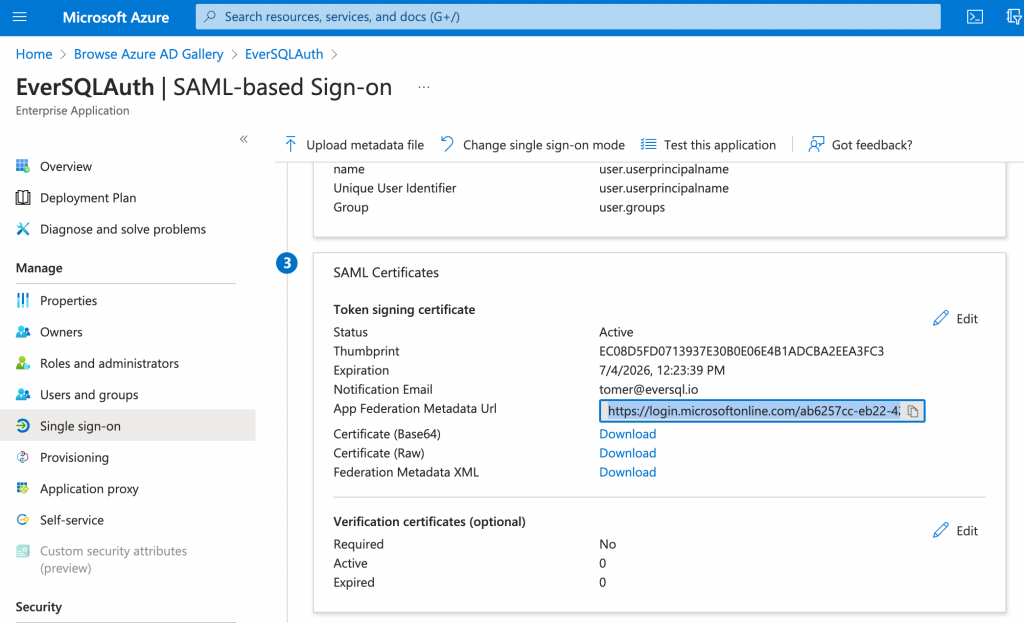
Step 3: Get the IdP metadata for your Azure AD application
Scroll down to the SAML Signing Certificate section, and copy the App Federation Metadata Url by choosing the copy into clipboard icon.
Send the URL to your EverSQL account manager, or to [email protected] to request setting up your organization with EverSQL's SAML SSO.
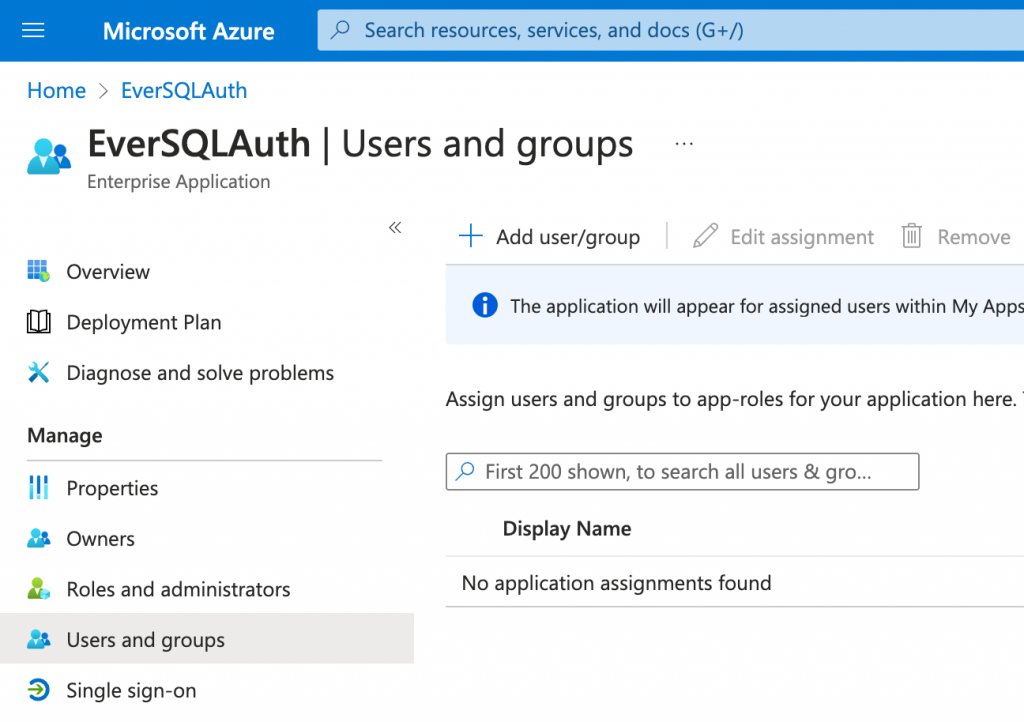
Step 4: Assign users to your AzureAD application
To assigns users to the EverSQL app:
- Navigate to the Users and Groups menu.
- Click Add user/group and choose the users that you'd like to have access to EverSQL.
- Optional: You can enable self-service configuration for a group of users, allowing new users to authenticate automatically without the need for manual addition. This streamlines the authentication process by empowering new users to authenticate themselves seamlessly.
Step 5: Login to EverSQL
Once you completed the steps above, and our team finished setting the SAML configuration on our end, you can guide your team to login via the login page, by clicking the "Using SSO?" link and submitting your username from Azure AD.